Last modified by Ursula Kirsten - 2 years ago
484 Views
4 min read

How to set up WP Ticket Pro WordPress plugin

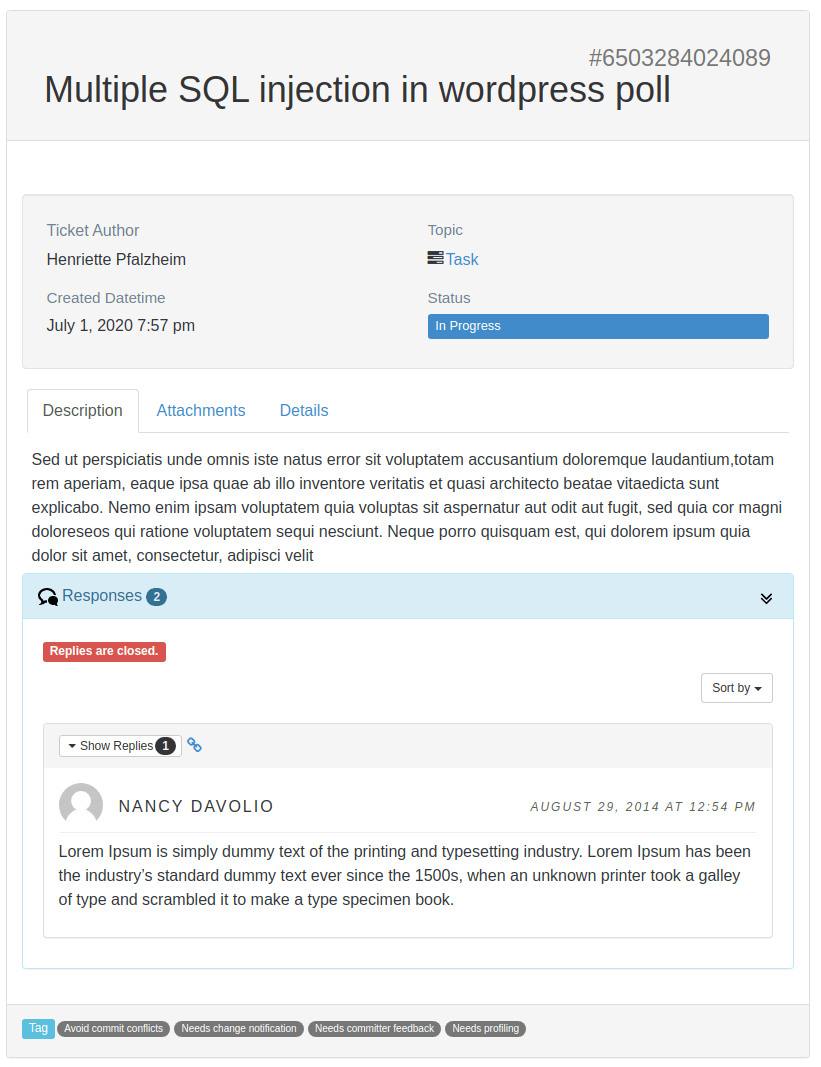
WP Ticket Professional WordPlugin offers a fully-featured yet easy-to-use helpdesk and customer service system. In this tutorial, we will show how to set up and configure the main components of WP Ticket Pro.

For brevity sake, we assume you completed the following steps:

  1. Downloaded the plugin zip file to your computer.
  2. Uploaded the plugin zip file by clicking on the "Upload Plugin" button on Plugins > Add New > Add plugins page.
  3. Activated WP Ticket Pro plugin
  4. Saved and activated your license

Before going over each step in detail, let's define a typical WP Ticket workflow.

  1. Get customer support requests through the website, social media, phone, or email.
  2. Assign customer support requests to Agents manually or by auto-routing.
  3. Respond to customer support requests via the WP Ticket commenting system.
  4. Notify customers through email when a response is posted to a service request.

If you follow the instructions below, you will have a functioning helpdesk or customer service system where customer can submit their requests and agents respond to the requests in an efficient, consistent way. When completing each step, we recommend you to think about the workflow above to see what each step accomplishes.

  1. Create Manager and Agent users
  2. Create Service Departments
  3. Create and customize WP Ticket Pro taxonomies
  4. Create WP Ticket Pro pages
  5. Set up WP Ticket Pro Notifications

1- Create Manager and Agent users

To be able to create support managers, you must create WordPress users first and assign each user to either the "agent" or "manager" user role.

Please note that agents can only see and respond to support requests assigned to them. Managers can assign, see and respond to all customer support requests.

To be able to allow Support Agents and Managers to login to WordPress, you must create a user for each Agent and Manager.

  1. Go to Dashboard > Users and click the name of the user to view or create a new one.
  2. Fill in the user details.
  3. Click the Role dropdown, and select "Manager" or "Agent".
  4. Click on the "Add New User" button to save.
  5. Complete the steps above for every agent and manager.

After Agent and Manager WordPress users are created, you must create actual Agents and Managers and assign them to each WordPress user created. Creating an agent record allows you to set up an agent page on the front end of your website.

  1. Go to Dashboard > Tickets > Agents and click on Add New button.
  2. Fill in all required fields.
  3. Under the info tab, click on the "Staff user" dropdown and select the Agent or Manager user corresponding to your record.
  4. Click Publish button.
  5. Repeat this process for every agent and manager.

2- Create Service Departments

Customer Service Departments are a group of agents who are responsible for a subject area. Each service department may have an unlimited number of agents. A support ticket can be assigned to a department instead of a support agent.

To create a department, follow the steps below:

  1. Go to Dashboard > Tickets > Departments and click on Add New button.
  2. Fill in all required fields.
  3. Make sure a unique department code.
  4. Assign agents to the department by clicking on the "Create Connections" link under the Agents box.
  5. Optionally, set the featured image of the department.
  6. Click Publish button.
  7. Repeat this process for every customer service department.

3- Create and customize WP Ticket Pro taxonomies

WP Ticket Pro comes with Service Level Agreements (SLAs), Channels, Priorities, Statuses, Ticket Tags, and Topics taxonomies. These taxonomies allow you to group and tag individual support tickets.

Each taxonomy comes with default terms. A term is a value assigned to a taxonomy. For example, SLA taxonomy has 1h, 6h, 24h, etc. terms. You should go over each taxonomy under the Tickets menu and customize the values listed matching your business.

4- Create WP Ticket Pro pages

WP Ticket Pro comes with a step of default pages. These pages could be created using the Setup Assistant. If you accidentally closed the Setup Assistant notifications, you create these pages by clicking on the "Install Pages" button that is located under Dashboard > WP Ticket Pro > Settings page> Tools tab.

By default, the following pages created through Setup Assistant or "Install Pages" button:

  • "Open a Ticket" - Used for submitting support tickets by customers.
  • "Search Tickets - Advanced" - Used for searching support tickets - recommended for internal users only.
  • "Search Tickets" - Used for searching support tickets by customers
  • "Ticket List" - All support tickets in a tabular format
  • "Registered User Submit Ticket" - Used by registered and logged-in users only to submit support tickets.
  • "Registered User Search Ticket" - Used by registered and logged in users only to search support tickets.
  • "Registered User Advanced Search Ticket" - Used by registered and logged in users only to searchsupport tickets - recommended for internal/trusted users only.

After the pages created, you need to display the page links to your customers by including them in your theme's menu. We recommend you to delete unused default pages.

5- Set up WP Ticket Pro Notifications

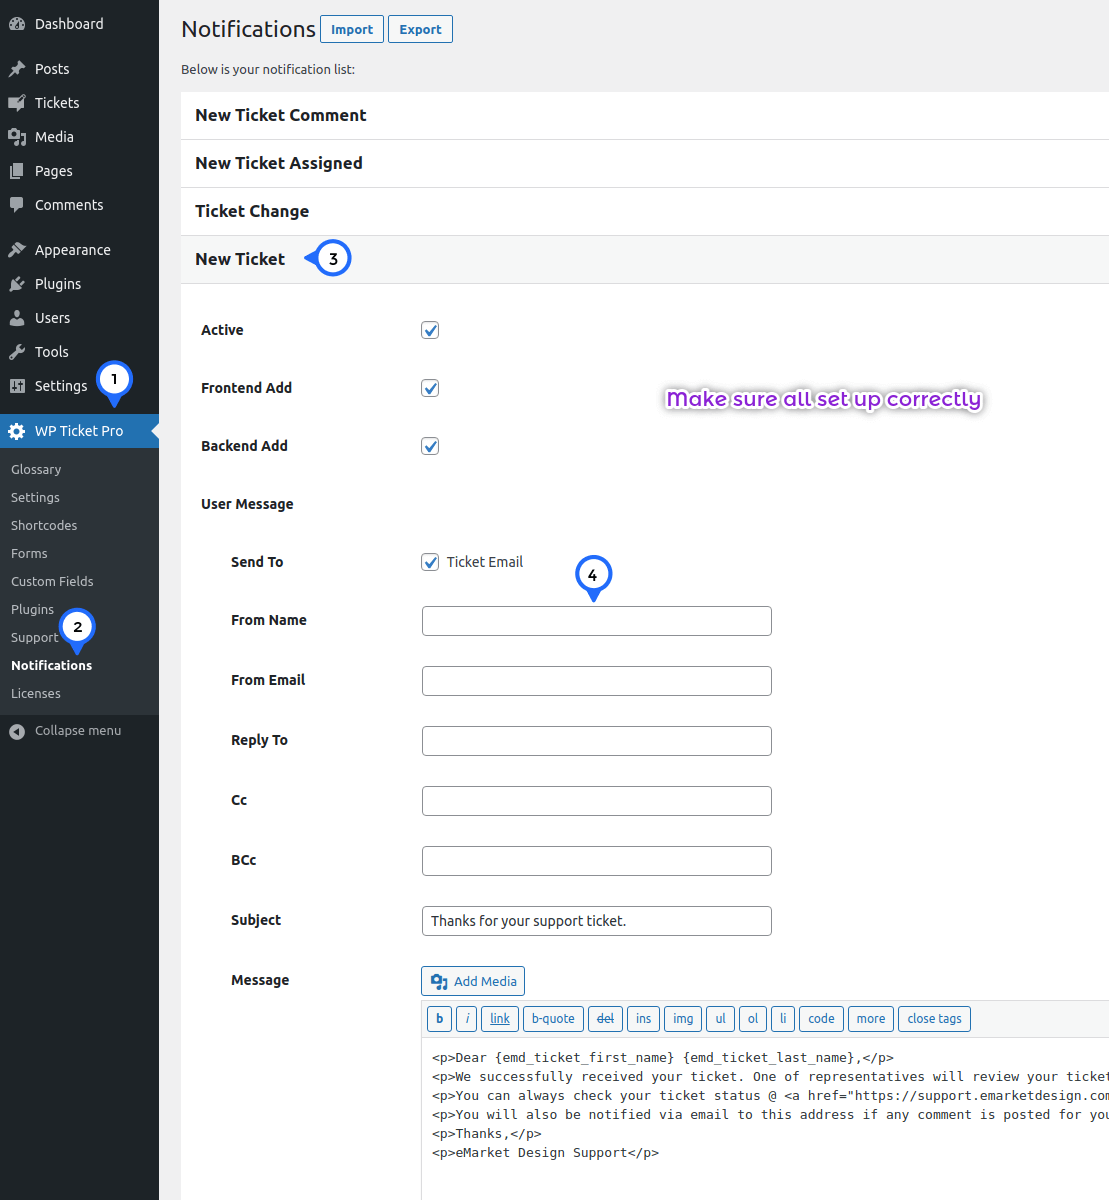
You can access the Notifications page by following the Dashboard > WP Ticket Pro > Settings page path. Click on the notification title to edit each notification setting.

WP Ticket Pro WordPress plugin comes with 4 Notification events:

  1. New Ticket Comment notification is sent to "The Comment Author Email", "Ticket Email", and "Assignee" when a new comment posted to a support request.
  2. New Ticket Assigned notification is sent to Assignee email.
  3. Ticket Changed notification email is sent to the customer who opened the support ticket when an agent responds.
  4. New Ticket notification email is sent to the submitting customer and optionally administrator or a catch-all email when a new support ticket is created in the system.

Please note, each notification email can be customized, temporarily deactivated.

If you or customer cannot get notification emails, you can check the following:

  1. Check if the notification active.
  2. Make sure all email addresses in the notification settings are valid emails.
  3. Check if you can send emails using WordPress. For example, every time you create a new WordPress user, you should get an email.
  4. Check if the appropriate "Sent to" checkbox set for notification.
Was this information helpful?