Loco Translate WordPress plugin offers an easy way to translate our plugins to any other language if you prefer a GUI based solution which is integrated with WordPress. Alternatively, go to docs.emdplugins.com and click on the link pointing to your plugin's documentation. Go to the Localization (l10n) section to see the instructions for manually creating po and mo files.
Every emdplugins.com WordPress plugin comes with two pot files. These files are located under the lang directory of your plugin. To be able to translate our plugins using Loco Translate, you need to create two translation sets and corresponding language files.
Follow the instructions below to get started:
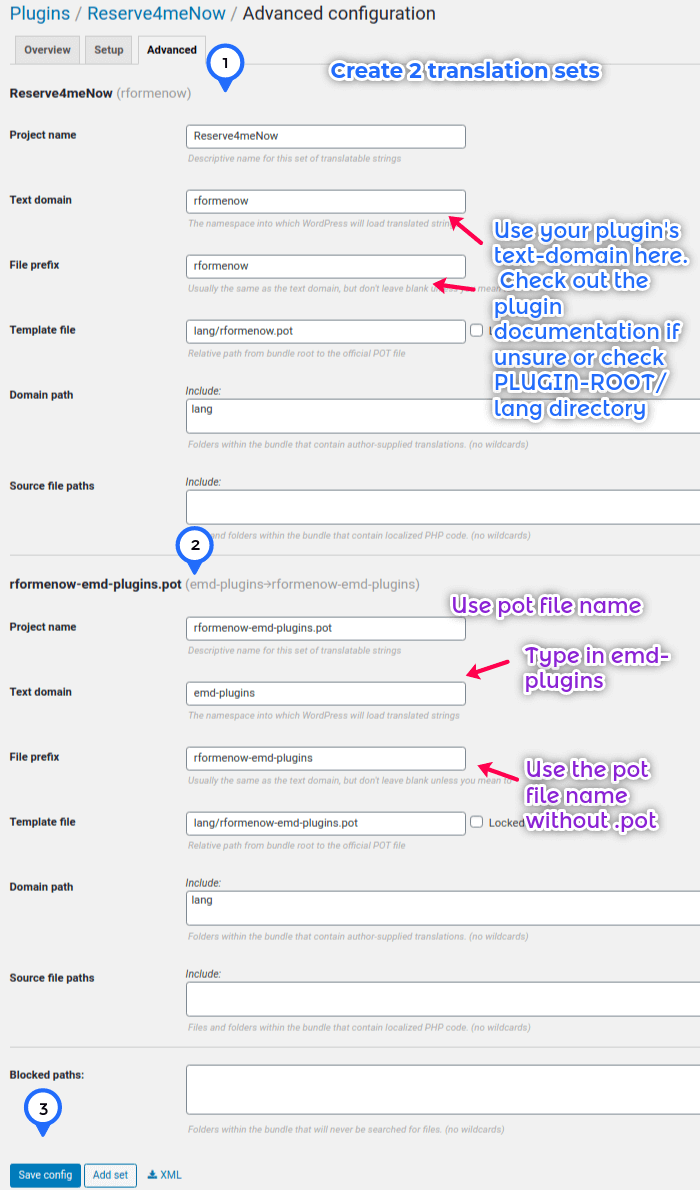
Create the first translation set
- Click on Loco Translate menu Plugins page.
- Find the plugin you want to translate from the list and click on the link.
- Click on Advanced tab and add a set.
- For the first set, enter a project name or the translation pot file name.
- For the plugin text domain, enter the name of the pot file name without the .pot extension. For example, for WP Ticket Enterprise it is "wp-ticket-ent".
- Enter the text domain value for the File prefix.
- Enter lang/POT-FILE-NAME for the template file. For example, for WP Ticket Enterprise it is "lang/wp-ticket-com.pot".
- For the domain path, Enter "lang".
Create the second translation set
- For the second set, enter a project name or the translation pot file name.
- For the plugin text domain, enter "emd-plugins".
- Enter "TEXT-DOMAIN-emd-plugins" for the File prefix. For example, for WP Ticket Enterprise it is wp-ticket-ent-emd-plugins. In other words, use the pot file name without the ".pot".
- Enter lang/POT-FILE-NAME for the template file. For example, for WP Ticket Enterprise it is "lang/wp-ticket-ent-emd-plugins.pot".
- For the domain path, Enter "lang".
- Click on the "Save config" button.
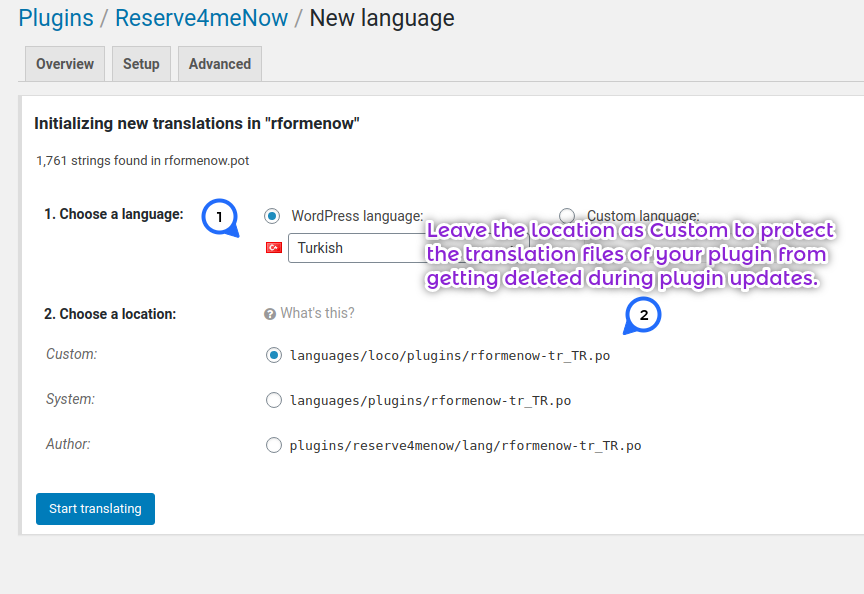
Create the language files
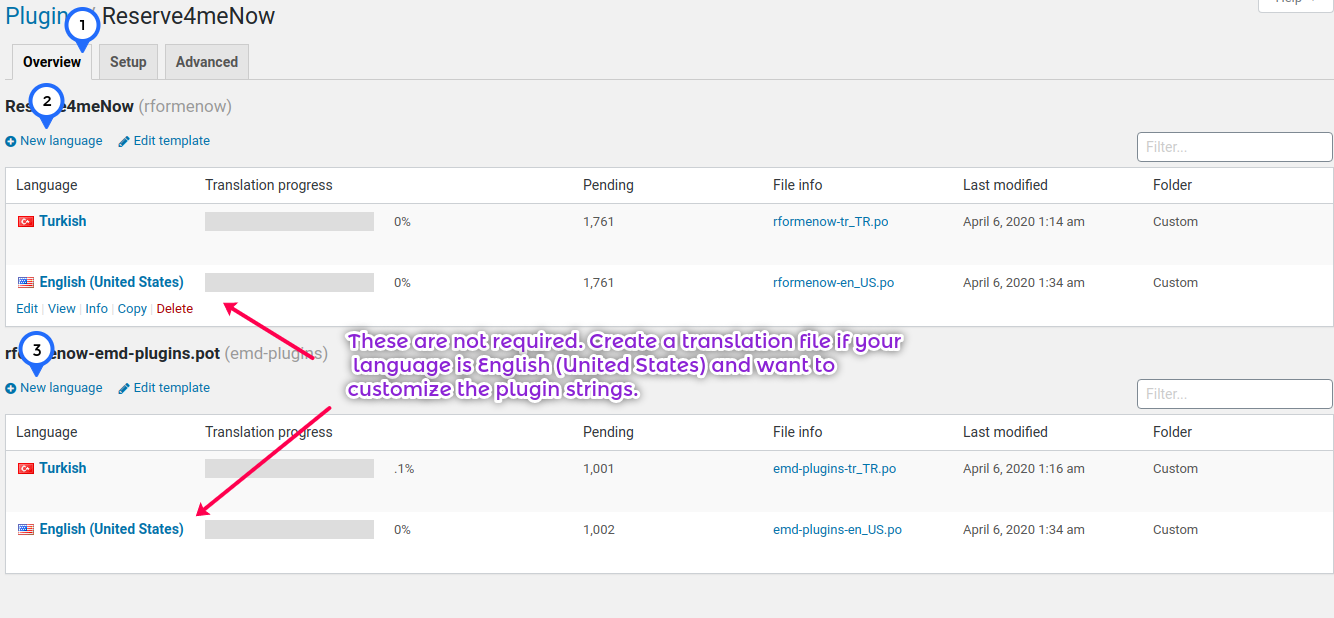
- Click on the Overview tab.
- Click on the "New language" link to create a new language file for each translation set.
- Choose your language from the dropdown or type in your custom language.
- Leave the location as Custom to protect the translation files of your plugin from getting deleted during plugin updates.
- Repeat this every language you want to translate the strings to.
Start translating the language files
- Click on the language file for a translation set.
- Start translating the strings one by one.
- Save
Upgrading the plugin translation files
If you followed the steps above correctly and chose the recommended custom location, your translation files are safe from the plugin updates. To update the pot files to another version, click on a language link and click on the Sync button.
Customization of plugin strings
If your main language is English and prefer to change certain strings to customize the plugin to your need, you can create a new dialect of English language and set your WordPress language to that language.
For example, you can create English (United States) language and then change "Employees" to "Associates" or "Events" to "Happenings". Once you save the translation file and your changes will start displaying immediately.
To learn more, check out the loco translate plugin instructions.